


Introduction
During the first meeting, we discuss your project, priorities, functional requirements, architectural preferences, budget, timeline, and expected scope of services. We also explain our workflow, clarify the key project stages, and identify any information or surveys required before design begins. Following the meeting, we prepare the project brief to structure the information needed for the next steps.

Based on the agreed brief, we develop the initial design concept for the house and refine it through a series of iterations.
We hold regular meetings or calls to review the current proposal together, discuss feedback, and make the necessary adjustments as the project develops toward the final concept.
Throughout the process, we also stay in touch via your preferred messaging platform for any questions that arise between meetings.

Preliminary design
The main goal of this stage is to bring together your requirements, defined through the brief, with the specific conditions of the site — its dimensions, area, topography, orientation, sunlight, views, and other key factors. The result is a developed 3D concept of the future house with defined floor area, spatial organization, key technical solutions, and a clear architectural direction.
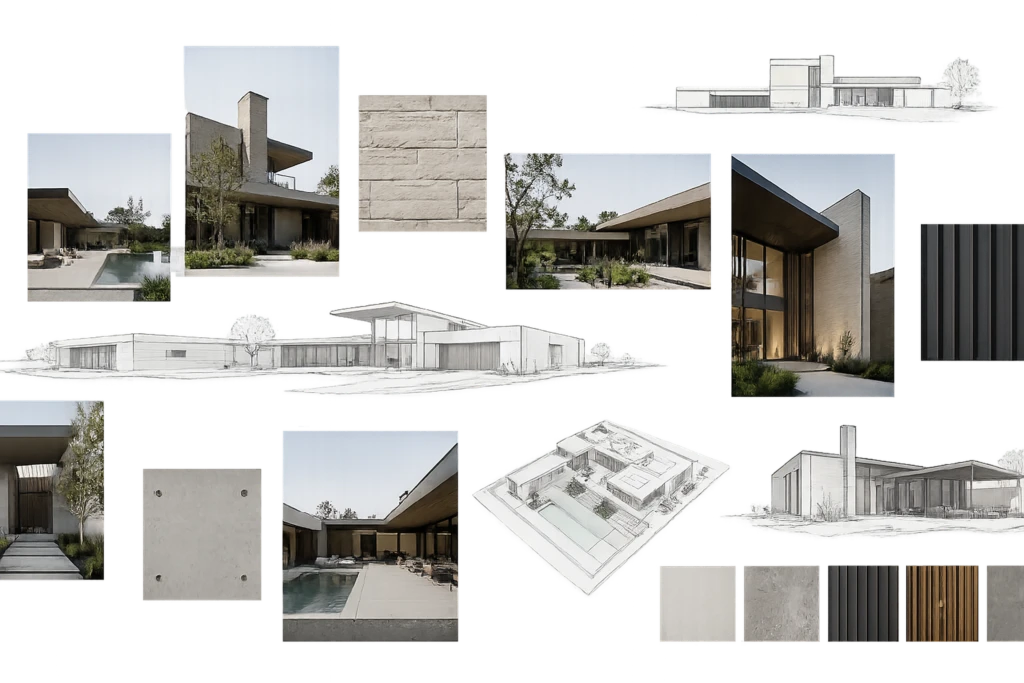
Based on the agreed brief, we develop the initial architectural concept and refine it through a series of iterations. Regular meetings or calls allow us to review the current proposal together, discuss feedback, and make the necessary adjustments as the project develops.
Throughout this stage, we also stay in touch via your preferred messaging platform to address questions between meetings.
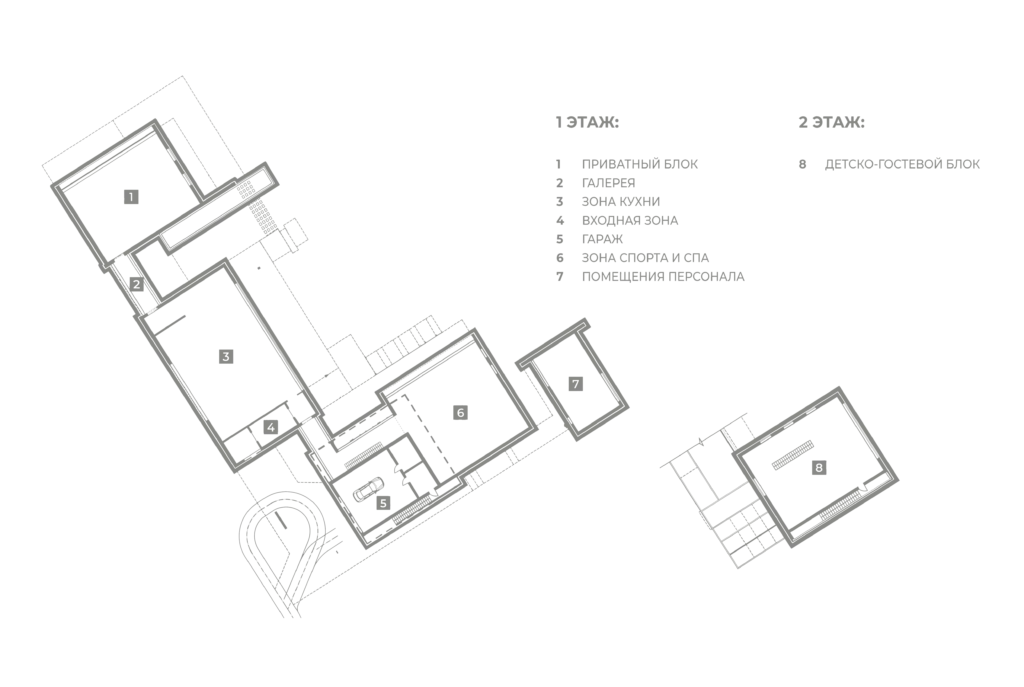
Once the initial concept is approved, we develop the spatial organisation of the house and its position on the site.
We consider the relationships between rooms, circulation, access, views, and everyday routines — from the location of the main entrance to the way you move between the car, kitchen, living areas, and private spaces. These practical scenarios help shape a layout that works naturally in daily life.
The next stage is the development of the house in 3D. The model allows us to refine key architectural decisions, including the building proportions, window placement, facade composition, and overall form.
At the same time, we use moodboards, references, and material selections to develop the exterior palette and define the architectural character of the house in greater detail.
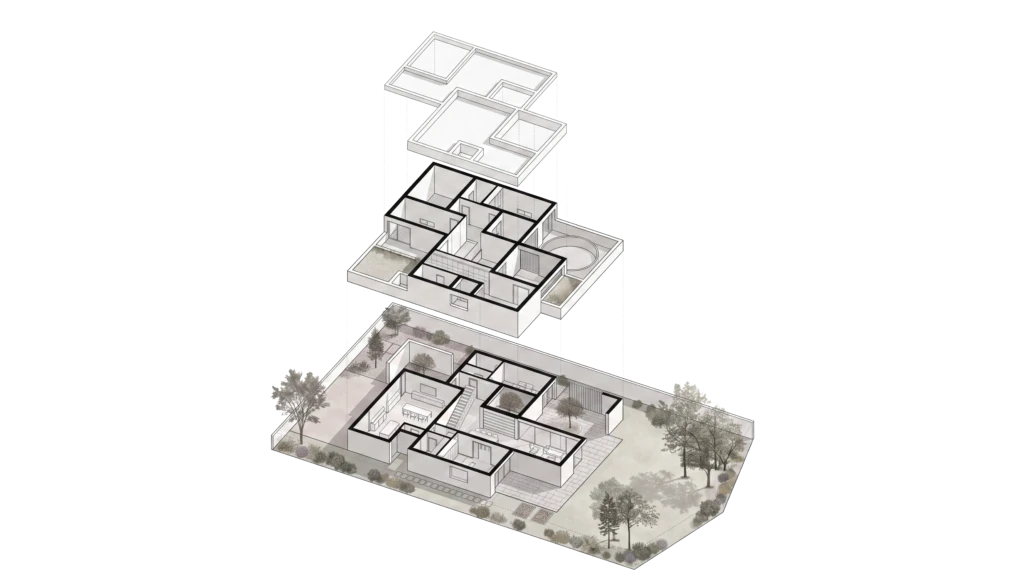
At this stage, the internal planning is developed in greater detail. We refine room dimensions, furniture placement, circulation, openings, storage, and the relationship between interior and exterior spaces.
The layout is coordinated with the architectural structure and everyday requirements of the client, ensuring that the spatial concept is both functional and ready for further technical development.
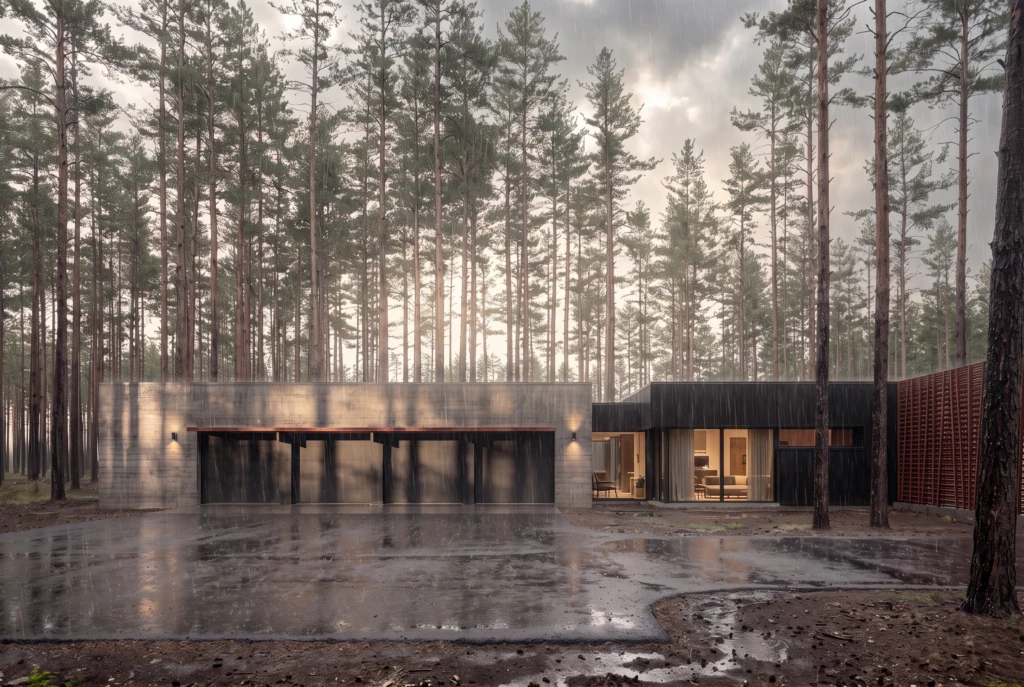
Once the architectural model is sufficiently developed, we create photorealistic visualizations of the house within its actual site context, including the surrounding landscape, orientation, and selected materials.
The images allow us to evaluate the proportions, façades, materials, and overall appearance of the building before construction begins. At this stage, we also refine façade solutions, review implementation options and costs, and coordinate with relevant suppliers and contractors.

The completed design is brought together into a comprehensive project package, providing a clear overview of the architecture, layouts, façades, materials, and key design decisions.
We also prepare a preliminary construction cost overview based on information received from contractors and suppliers. This makes it possible to understand the financial implications of the proposed solutions early enough to adjust materials or technical decisions if the project begins to exceed the intended budget.
Construction project
The main goal of this stage is to translate the approved concept into clear technical documentation for construction. In other words, we define how the architectural idea can be built in practice.
The construction documentation is developed in two main parts by specialised professionals: Architectural Design and Structural Design. Together, these sections provide the drawings, details, and technical solutions required to move from the concept stage to construction.
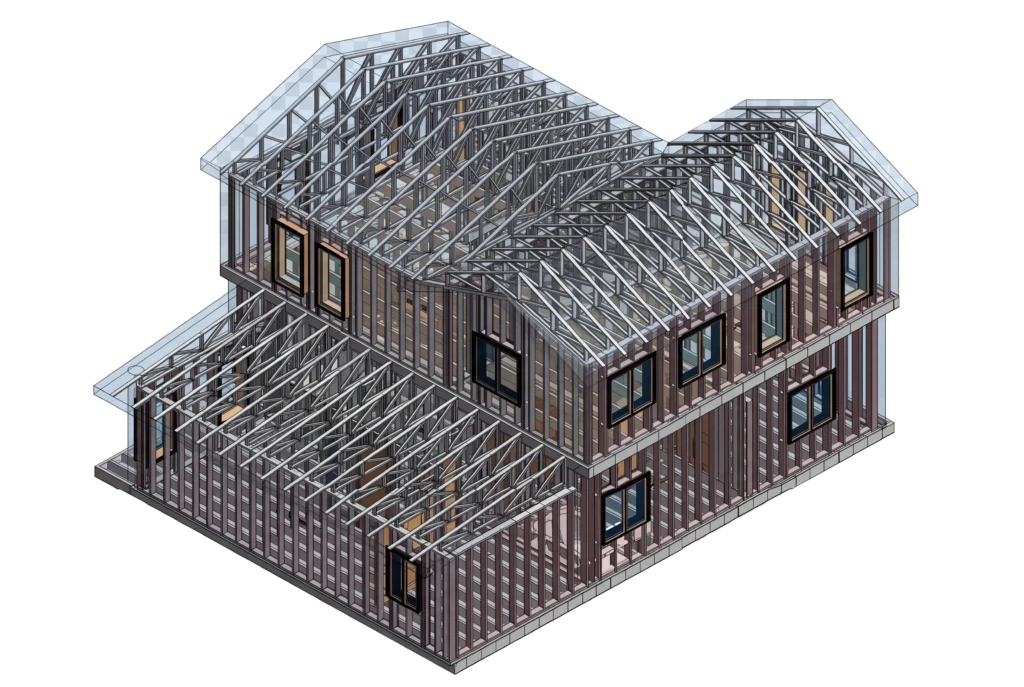
This section is developed by a structural engineer, who calculates the building loads and designs all primary load-bearing elements, including the foundations, columns, slabs, beams, walls, and other structural components.
The aim is to ensure the safety, stability, and durability of the building while keeping the structural system aligned with the architectural concept and project budget.
Geotechnical information about the site is required at this stage. You may arrange the survey independently through a specialist company, or we can coordinate it for you as an additional service. Based on soil conditions, groundwater levels, and other site data, the structural engineer determines the appropriate foundation system, load distribution, and structural strategy for the house.
The engineer also calculates the main quantities of structural materials, including concrete, reinforcement, and other key components, and develops the technical details required for construction.
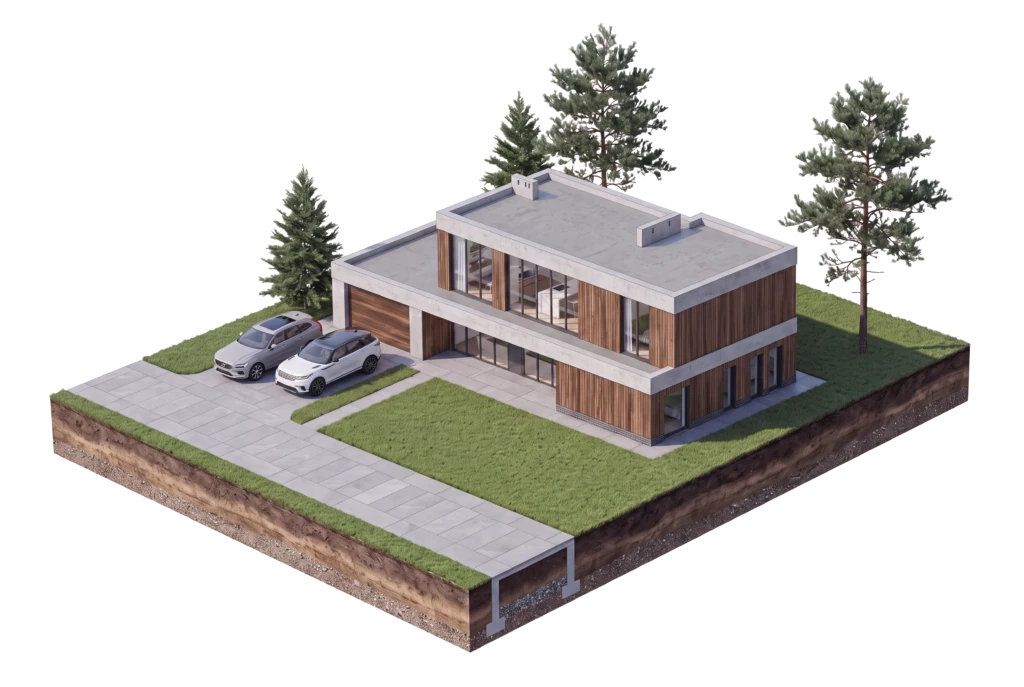
In parallel, the architect develops the approved concept into a detailed set of construction documents.
This includes drawings, schedules, specifications, and technical details that define how the architectural design should be implemented. The documentation covers window locations and opening types, façade systems, insulation, exterior finishes, materials, architectural details, and other elements that affect both the appearance and technical performance of the building.
The final package includes the architectural drawings, key material schedules, and specifications required by contractors. This provides a clear understanding of the materials and quantities involved and gives the construction team precise instructions for implementing the approved design.
MEP Engineering
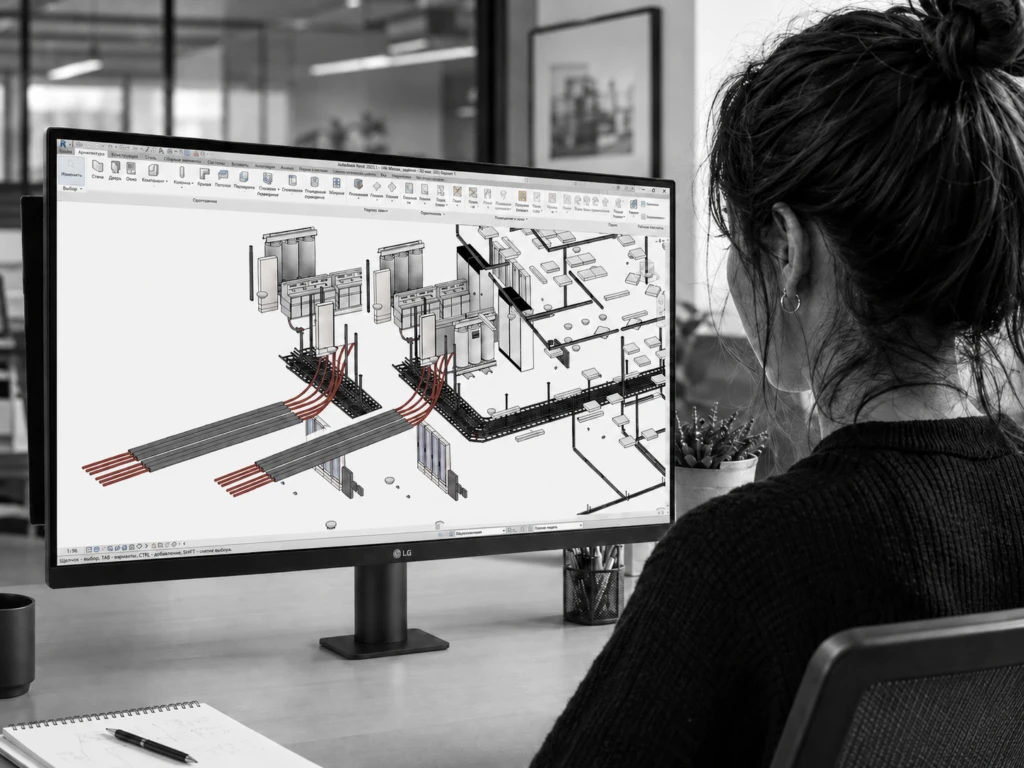
The engineering design process begins with a detailed assessment of the conditions that will affect the future house and its connection to external utilities.
We review the available infrastructure and connection requirements for electricity, water, gas, drainage, and other services, together with the building’s structure, layout, technical limitations, and expected loads. This information forms the basis for selecting the most appropriate engineering solutions.
More than five specialised engineers may be involved in this stage, each responsible for a specific system. Their work is then coordinated as one integrated package to ensure that all systems function together and remain compatible with the architecture and construction.
This approach helps identify the most suitable solutions early, avoid conflicts between different engineering sections, and develop a coordinated technical strategy tailored to the specific house.
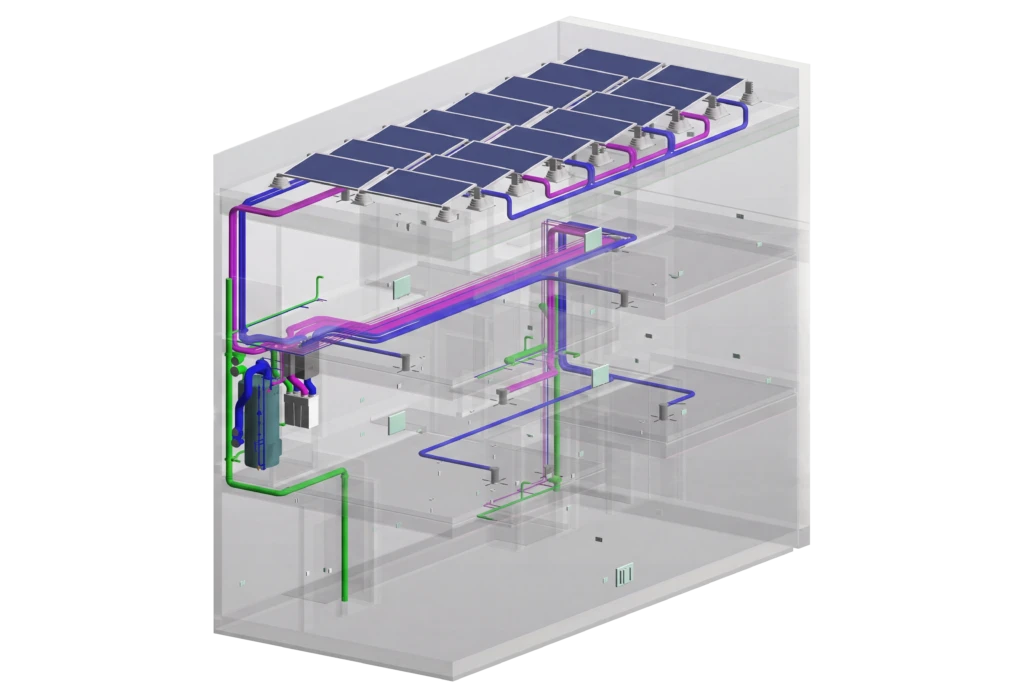
All proposed engineering systems are integrated into a coordinated BIM model of the house. The model is then reviewed by the architect to ensure that solutions developed by different specialists work together without conflicts, clashes, or inconsistencies.
This coordination stage allows potential issues between engineering systems and the architectural design to be identified and resolved before construction begins.
As a result, you receive a complete engineering package for the house, including coordinated drawings, diagrams, technical notes, and implementation guidelines.
The electrical layout is developed separately as part of the interior design stage, once furniture, lighting, and everyday use of the spaces have been defined. This is when we determine the exact locations of sockets and switches, lighting types, fixture quantities, and other details that depend directly on how each space will be used.
Interior Design
The main goal of interior design is to create a comfortable, functional, and aesthetically balanced space that reflects your visual preferences, habits, and lifestyle. As a result, you receive a thoughtfully designed interior where everything is convenient, practical, and tailored specifically to you.

At this stage, you meet with our lead designer to discuss your lifestyle, priorities, visual preferences, and expectations for the future interior.
If we were not involved in the architectural design of the property, we also collect the key project information, including its location, floor area, existing layout, and technical conditions. We then carry out site measurements to create an accurate base for the next stages of the interior design process.

After the initial meeting and review of your requirements, we prepare a detailed project proposal. It is based on our discussion and, where required, a completed brief that helps us define the project objectives, scope of services, and key requirements for the future interior.
Once the proposal is approved, we formalise the collaboration through an agreement outlining the scope, schedule, fees, and communication process. The design stage begins after the agreement is signed and the initial payment is received.

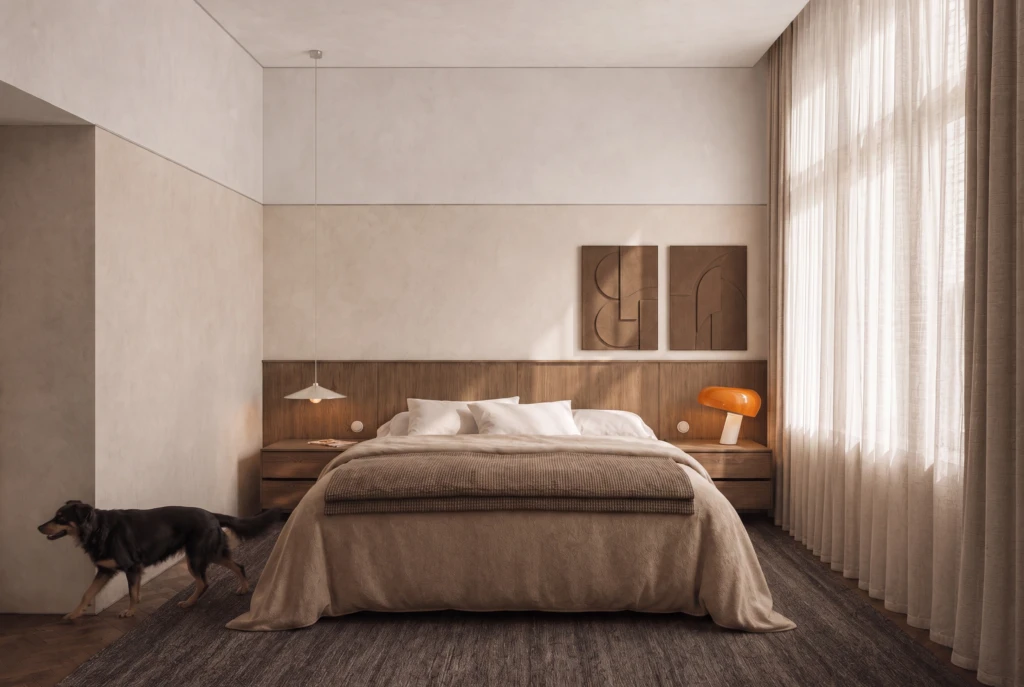
At the final stage, we bring all approved design work together into one comprehensive project package. It provides a complete overview of the future interior, including the visual concept, layouts, materials, furniture, lighting, décor, and key design decisions.
We also prepare a preliminary implementation cost estimate based on information provided by our suppliers, contractors, and project partners. This gives you not only the design documentation, but also an early understanding of the expected cost of delivering the proposed interior.
If the estimated cost begins to exceed the agreed budget, we can review the project before construction starts, adjust selected materials or individual items, and develop suitable alternatives while preserving the overall design concept.
Building Construction

In this format, we take full responsibility for managing the construction process, including the schedule, budget, contractor coordination, and quality control.
We begin by preparing a detailed cost estimate and scope of works for the project. Once approved, the construction is divided into clearly defined stages, with agreed deadlines and responsibilities for each contractor. You receive one consolidated document containing the scope of works, contractor quotations, and the overall construction programme.
A dedicated project manager is assigned to your project as your main point of contact. They coordinate the contractors, manage day-to-day communication, monitor progress, and resolve issues that arise during construction.
Several specialists are involved throughout the process. The architect reviews the work to ensure it remains consistent with the approved design, the construction manager oversees the site operations, and independent technical inspectors are engaged when required to assess workmanship and construction quality from a technical perspective.

With this level of involvement, the day-to-day organisation of construction and communication with contractors remain under your responsibility. Our role is to carry out periodic site reviews and assess whether the work is being implemented in accordance with the approved architectural and interior design documentation.
During each visit, we review the key elements of the project, including wall positions, window dimensions and placement, selected engineering and technical details, and the use of approved materials and construction solutions.
Our responsibility is to help ensure that the completed work remains consistent with the original concept and project documentation, rather than being altered through independent decisions made on site by the construction team.
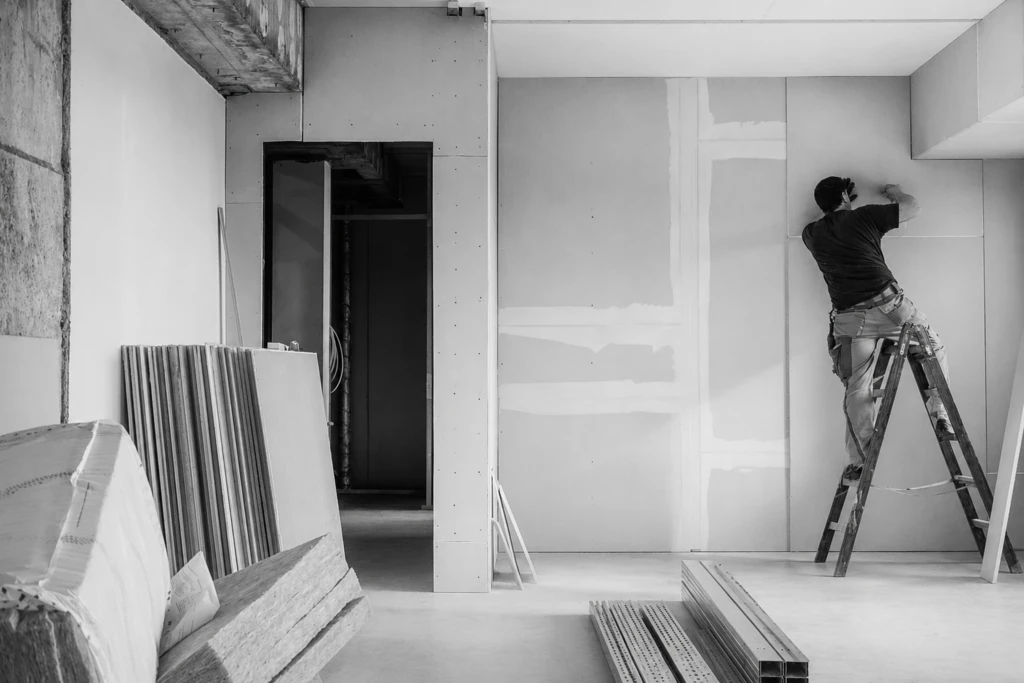
We deliver the construction of private homes and full turnkey interior fit-outs — from initial site preparation and structural works to final finishes, furnishing, and handover.
Our scope covers every key stage of the build, including demolition, structural construction, engineering systems, finishing works, equipment installation, furniture installation, and the production of bespoke elements by trusted specialist contractors.
Our role is to deliver the project as designed, ensuring that the completed property remains consistent with the approved architecture, interior design, specified materials, and technical solutions.
Interior Fit-Out
At this stage, we take responsibility for bringing the project to life and ensuring that the completed interior follows the approved design, documentation, and technical solutions. Depending on the level of involvement required, we offer either design supervision or a full turnkey interior fit-out delivered by our own construction team, with responsibility for coordination, workmanship, and final quality.
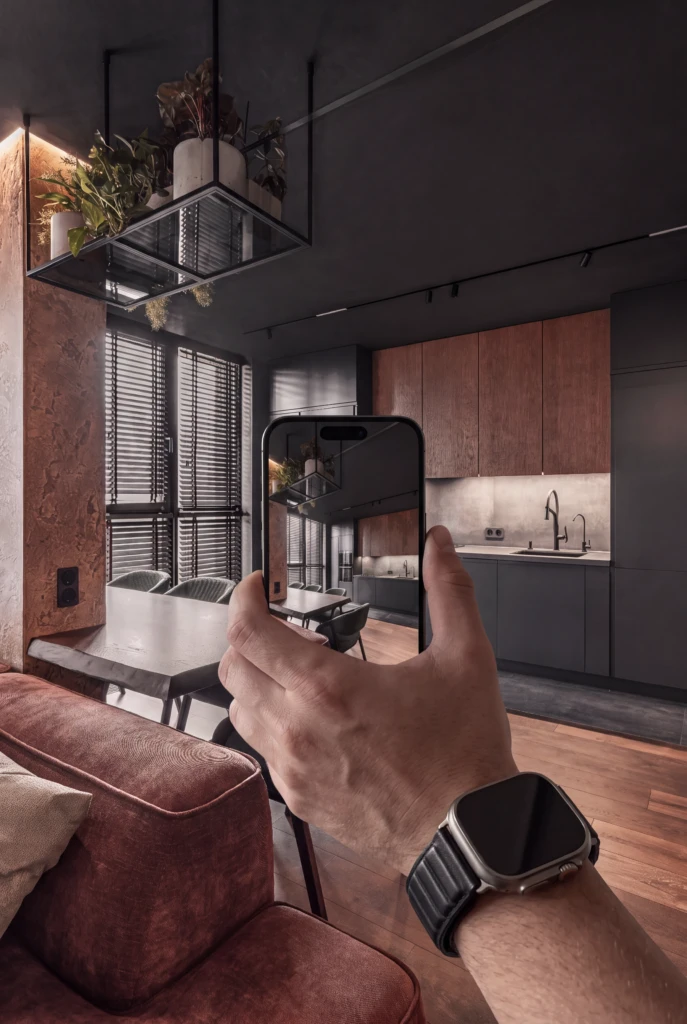
During design supervision, we oversee the implementation of the interior project to ensure that the completed space remains consistent with the approved concept, drawings, materials, and design solutions. We review work on site, coordinate material and product procurement, and monitor the quality of execution within the scope of the design.
You may work with your own construction team, while we coordinate with your contractors, clarify project documentation, review samples and completed work, and resolve design-related issues that arise during construction. Our role is to protect the original design intent and guide the project through to a coherent and accurately executed result.
We deliver projects with our own construction team and take full responsibility for the entire implementation process. From the moment we enter the site, we manage every stage of the work — site preparation, demolition, structural construction, engineering systems, rough and finishing works, equipment installation, furniture assembly, bespoke elements, styling, and final handover.
The construction process is organised around the approved design documentation, material specifications, budget, and project schedule. We coordinate our construction team, specialist contractors, suppliers, and manufacturers, oversee procurement, resolve technical issues on site, and control the quality of execution at every stage.
In practical terms, you can hand us the keys to the property and receive a fully completed, furnished, and ready-to-use space. With one team responsible for both the design and its implementation, we are able to preserve the original project vision and ensure that the completed interior accurately reflects the approved concept, materials, details, and technical solutions.
Visualization

The process begins with a detailed review of the brief provided by the architect, designer, or client. It typically includes:
- floor plans
- elevations
- furniture drawings
- material specifications
- product links
- style references
- preferred camera angles
- deadlines and delivery requirements.
At this stage, we define the exact scope of the project: interior, exterior, or product visualization, the required number of images, level of detail, schedule, delivery format, and number of revision rounds. This ensures that all expectations and technical requirements are agreed before production begins.
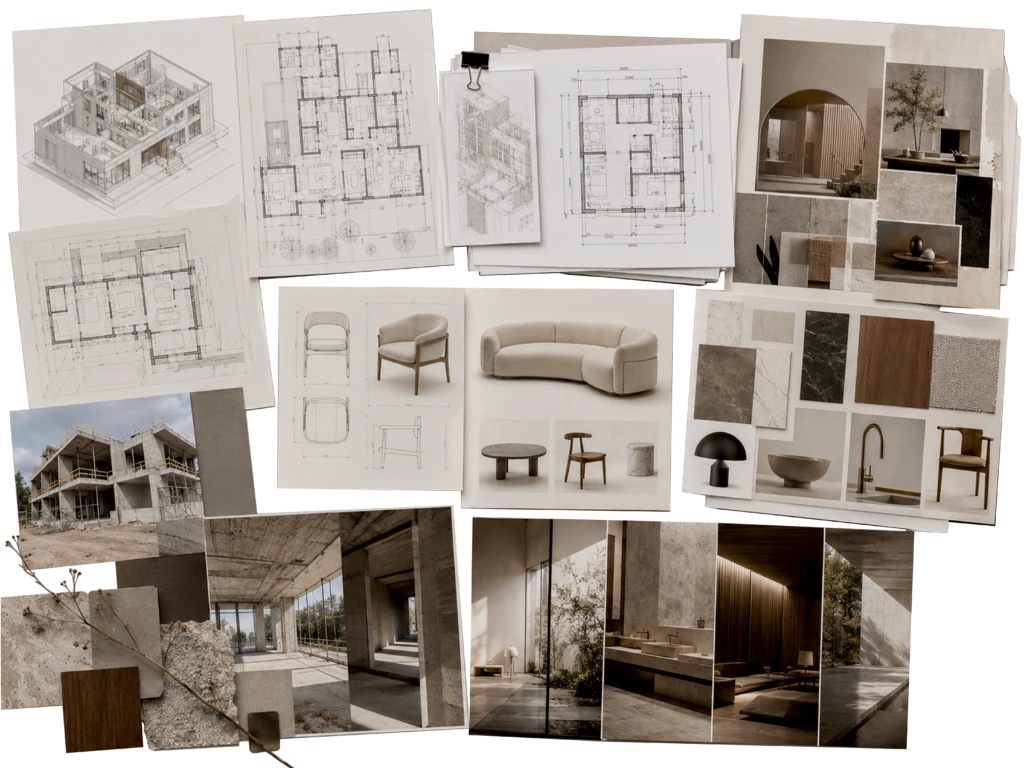
Before production begins, we review all available project information to confirm that there is sufficient detail to proceed. Depending on the project, the required materials may include:
- DWG / FBX / RVT files
- PDF drawings
- dimensions
- collages from the designer
- 3D models of furniture
- links to materials
- photos of the site
- mood references
If any essential information is missing or unclear, we prepare a list of questions and clarify the necessary details with the architect, designer, or client before moving on to the 3D modelling stage. This helps prevent inaccuracies, unnecessary revisions, and delays later in the process.
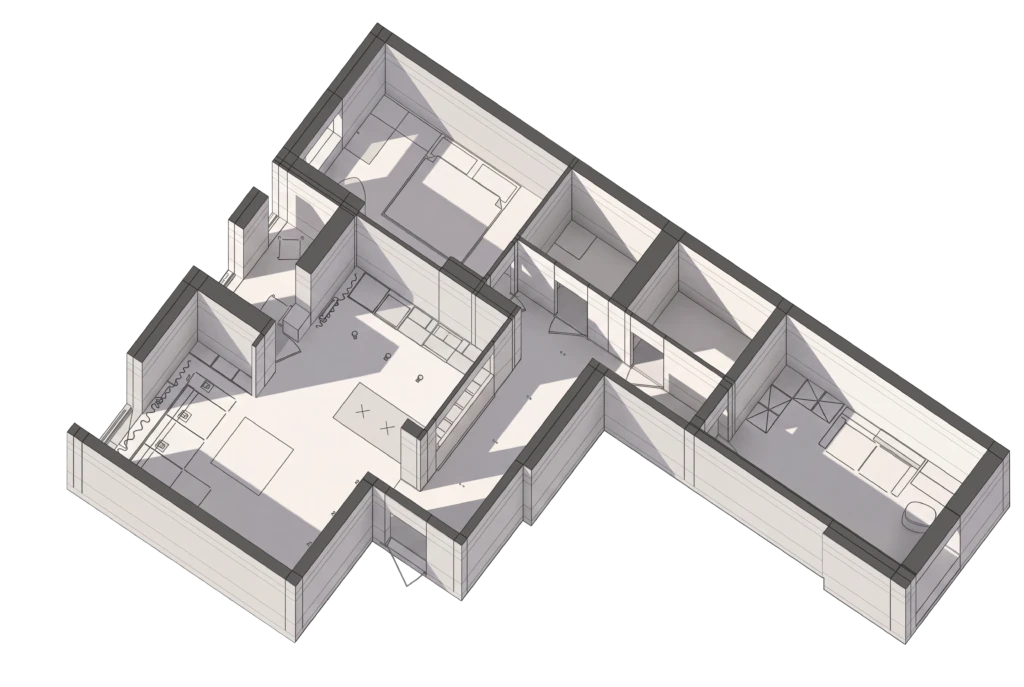
The next stage is usually the creation of the basic room shell in specialized software such as 3ds Max, Blender, SketchUp, Cinema 4D, and others. At this stage, the following elements are created: walls; floor; ceiling; windows; doors; main niches; staircases, if any; large architectural elements of the space. This is not yet the final polished image, but the technical foundation of the scene.
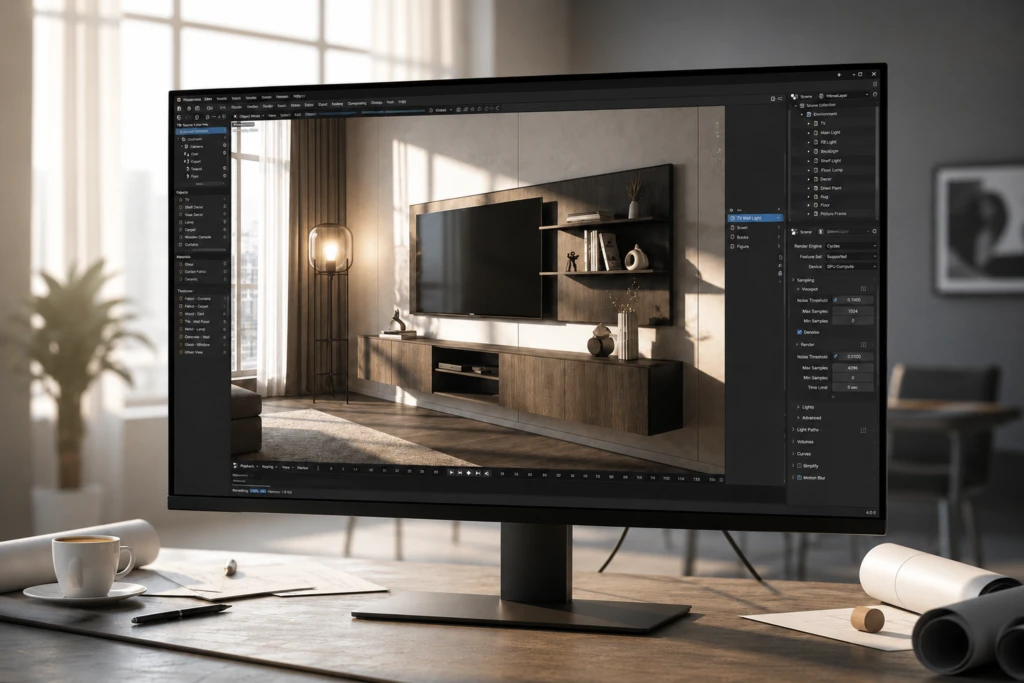
Once the base 3D model is complete, we place the main furniture, lighting, built-in elements, sanitary fixtures, and decorative objects according to the approved plans, design collages, and references. At this stage, we check the scale and proportions of each element, the distances between objects, circulation routes, and the overall balance of the composition.
Materials and fine details remain provisional at this point. The purpose of this stage is to confirm the layout and composition before moving on to detailed modelling, material development, lighting, and final visualization.
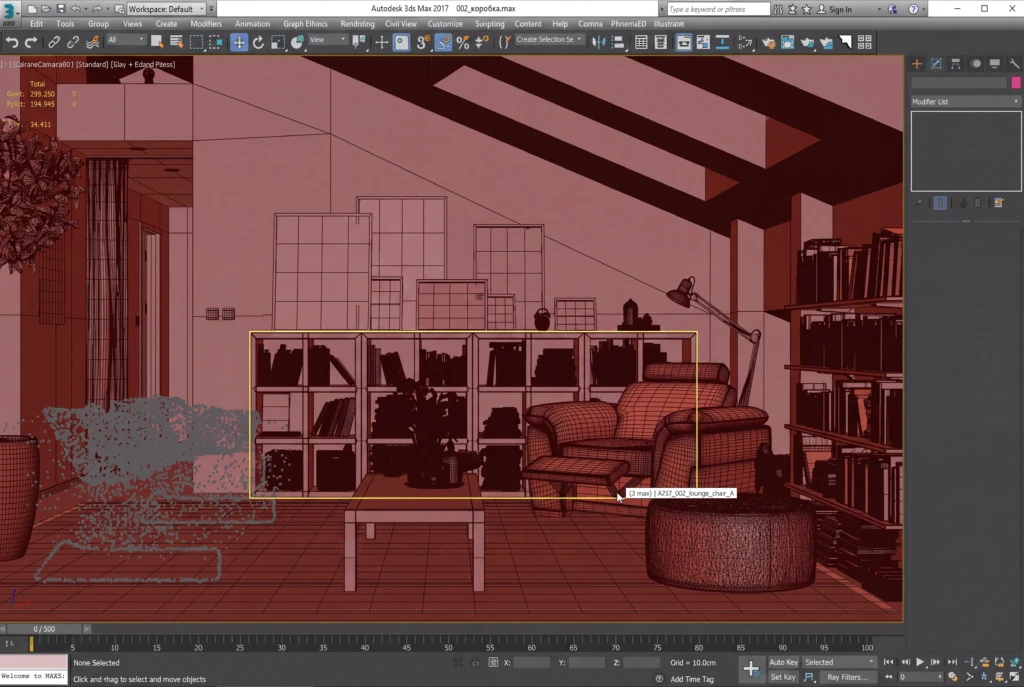
Selecting and approving the camera angles is a key stage in the visualization process, as it defines how the project will ultimately be presented. Once the base model and preliminary object placement are complete, we set up several camera options and prepare draft views for review. These are usually provided as viewport screenshots, clay renders, or simple grey-material images, allowing attention to remain focused on composition rather than finishes.
At this stage, we agree on the most important aspects of each view: the position from which the space is shown, the elements included in the frame, camera height, field of view, perspective, composition, and the total number of final images. We also check whether the selected angles communicate the scale, layout, key design features, and atmosphere of the project clearly.
Camera angles are approved before detailed material development, lighting setup, and final rendering begin. Confirming them early helps avoid unnecessary work, because a major camera change at a later stage may require furniture, lighting, materials, and scene details to be adjusted or rebuilt. Once the angles are approved, they become the fixed basis for the next stages of production.
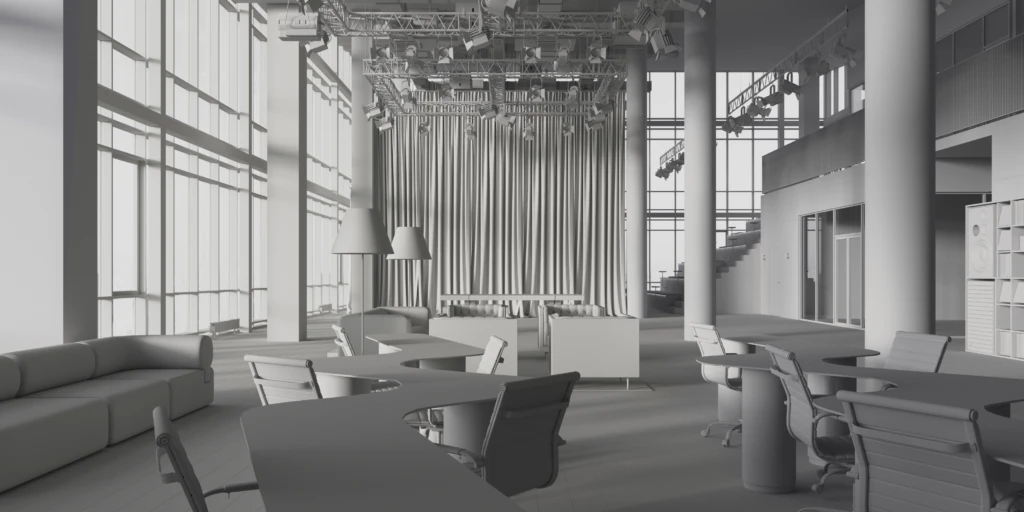
Once the camera angles are approved, we prepare clay renders using neutral materials. This allows us to focus on the geometry of the space, proportions, lighting, depth, and overall composition without the distraction of colours and final finishes.
At this stage, we review how the architecture, furniture, and major elements read within each frame and make any necessary adjustments before moving on to detailed material development. The approved clay renders become the basis for the next stage of visualization.
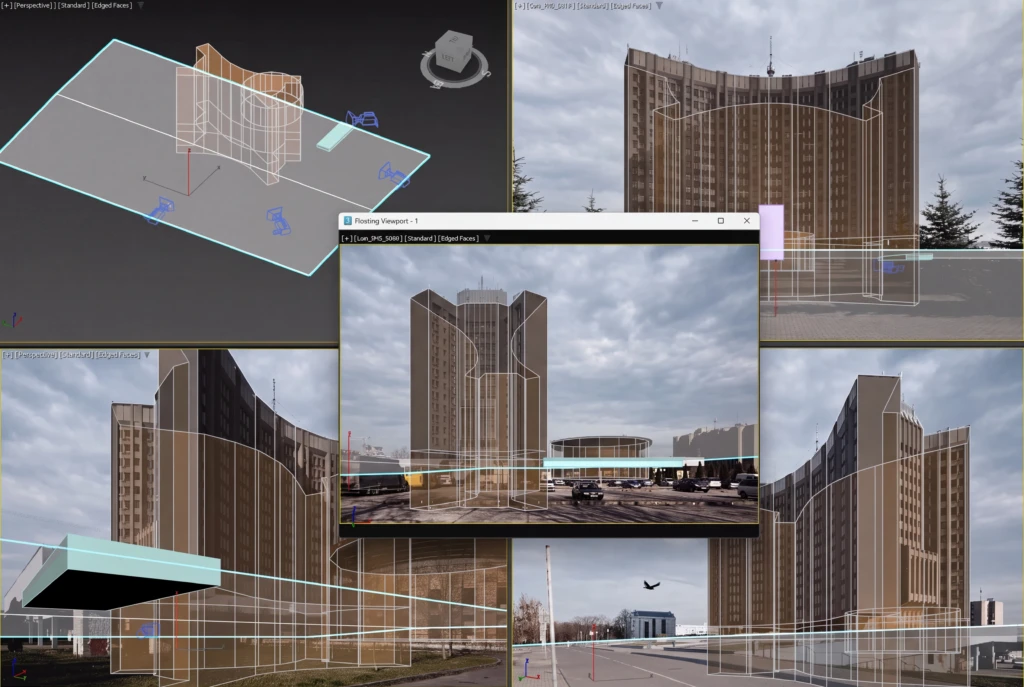
After the clay renders are reviewed, the architect or designer provides the first consolidated round of feedback. At this stage, we may adjust furniture placement, camera position or height, geometry, dimensions, layout, or replace individual models and elements where required.
This review allows us to refine the scene before moving on to detailed materials, lighting, and final visual development. Consolidating the main adjustments at this stage helps keep the following phases efficient and reduces unnecessary revisions later in the process.
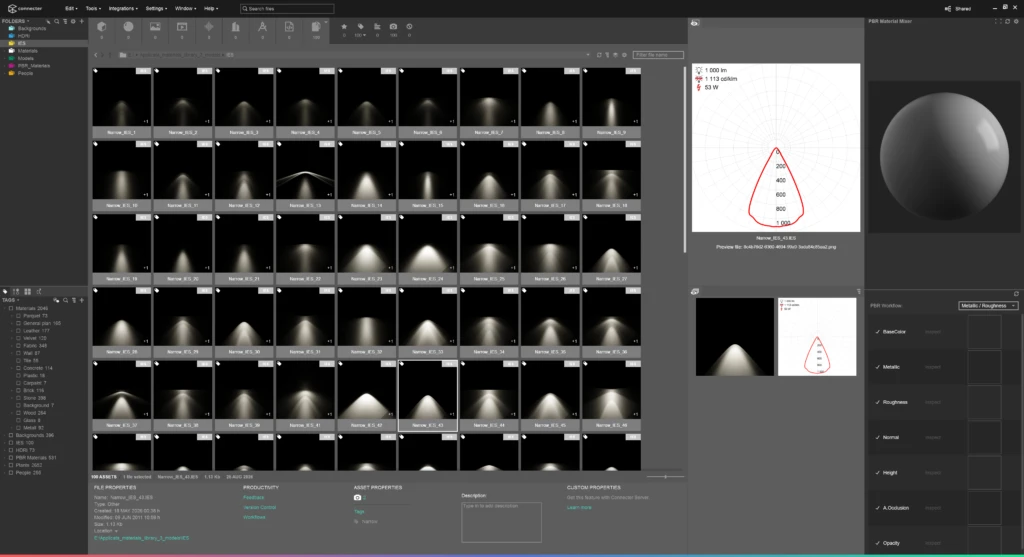
With the geometry and camera angles approved, we begin developing the visual character of the scene. At this stage, we refine the materials and finishes throughout the project, including walls, flooring, timber, stone, fabrics, metal, glass, and other surfaces, while also adjusting textures, reflections, and material response.
Lighting is developed alongside the materials to establish the overall atmosphere of the image. We define the lighting scenario, balance natural and artificial light, adjust colour temperature, contrast, and reflections, and refine how each material behaves under the selected conditions.
Additional attention is given to the relationship between light, surface texture, and depth, so that the image feels consistent and visually convincing rather than overly polished or artificial. At this point, the visualization already closely resembles the final result, with the main material palette, lighting, and overall mood established.
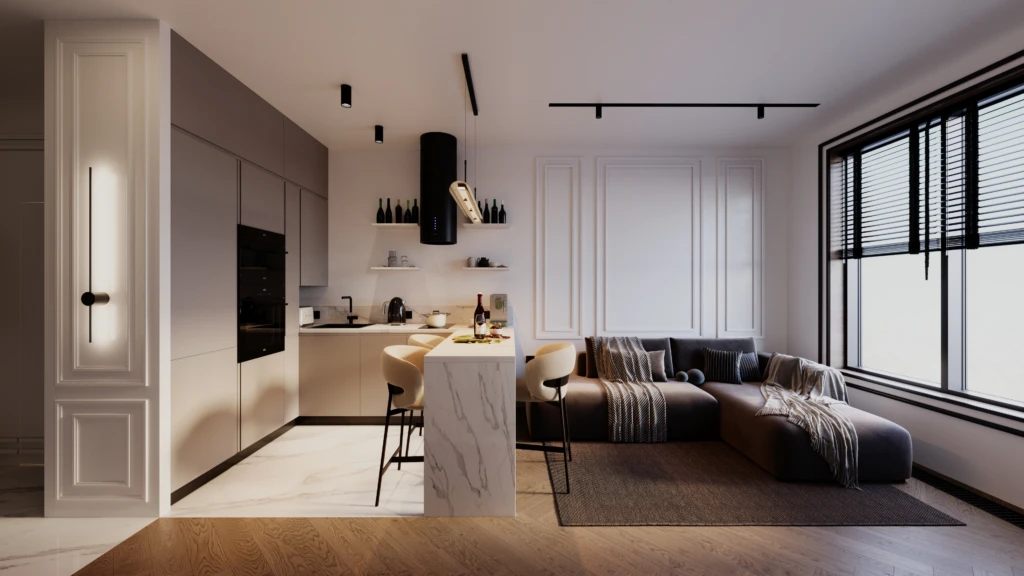
After the materials and lighting have been developed, we prepare the first draft colour renders for review. At this stage, we evaluate the overall colour balance, material appearance, textures, lighting, furniture and décor, as well as the consistency of the image with the approved design.
We also review the overall atmosphere, depth, realism, and visual balance of each frame, making any necessary adjustments before the final refinement stage. The image is already close to completion, but there is still room to fine-tune materials, lighting, and individual details before the final render.
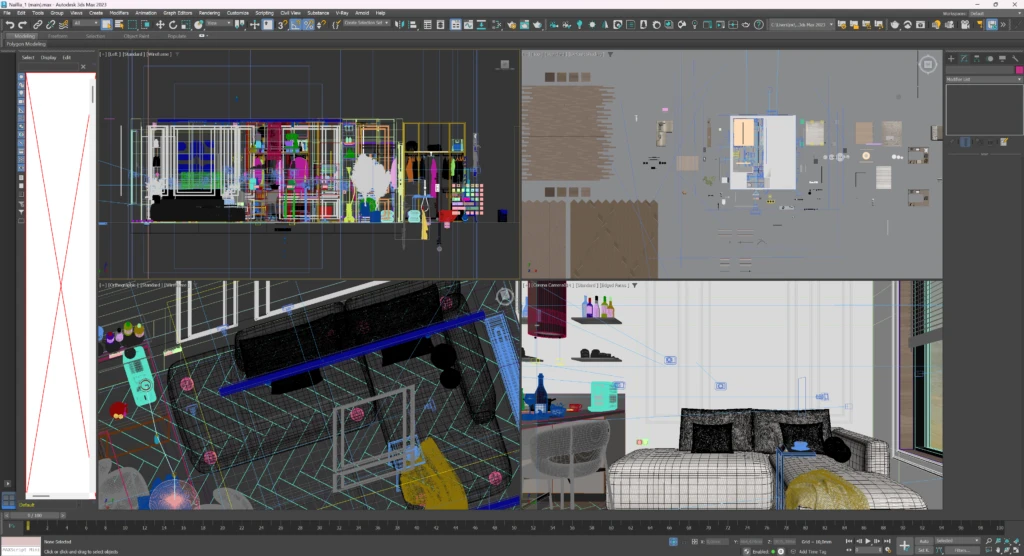
Following the review of the draft colour renders, we proceed with a second round of revisions focused primarily on visual refinement. This may include adjustments to lighting temperature, material tones and textures, wall colours, contrast, curtains, décor, and smaller scene details.
At this stage, the overall layout, geometry, and approved camera angles should already remain fixed. Significant changes to the spatial arrangement or major design decisions may require additional modelling and are therefore treated as a separate scope of work.
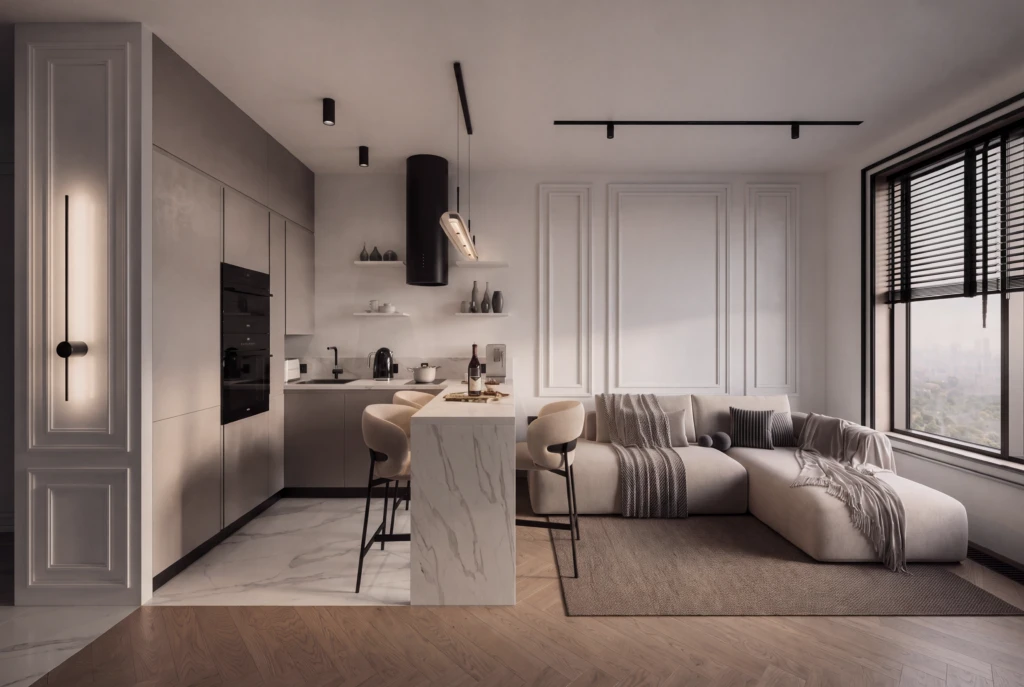
With all key elements approved, we proceed to the final high-resolution rendering stage. Each image is produced with the approved composition, materials, lighting, and scene details, with particular attention to clarity, realism, and overall visual balance.
The final renders are prepared at full resolution and carefully checked for image quality, material consistency, lighting, reflections, and technical accuracy before delivery. At this stage, we also make the final fine adjustments to ensure that all images feel consistent as one complete visual series.
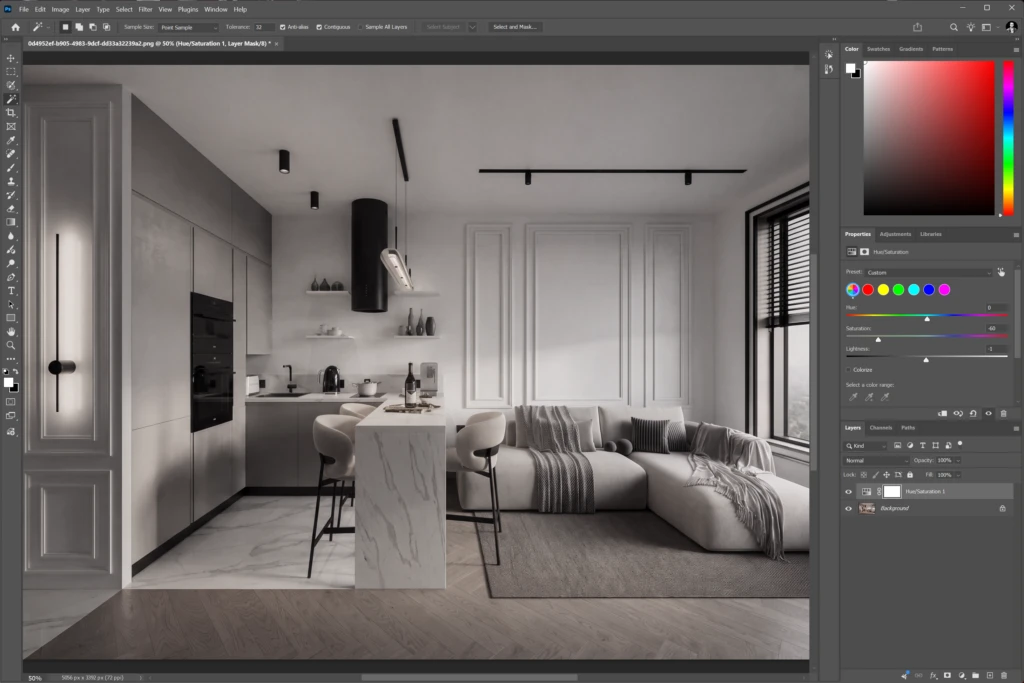
Following the final render, the image is refined in Photoshop or other professional editing software. Post-production may include colour correction, contrast and tonal adjustments, subtle lighting accents, sharpening, atmospheric refinement, and minor visual corrections.
Where required, additional environmental elements such as exterior context, sky, background details, or people may also be integrated into the image. The purpose of this stage is to bring all elements together and achieve a polished, balanced, and visually consistent final result.

Commercial
We design and deliver commercial spaces for offices, restaurants, bars, retail, salons, hotels, and other business formats. Our approach brings together business objectives, functional planning, guest and staff circulation, engineering requirements, and visual identity, guiding the project from concept and construction documentation through to construction and final completion. This allows us to maintain control over key decisions at every stage and create spaces that are considered both in terms of design and day-to-day use.
At the first stage, we study the property, the business objectives, and the operational requirements of the future space. It is important for us to understand not only the size and layout of the premises, but also the format of the venue, its target audience, and the way both guests and staff will use and move through the space.
We analyse the existing conditions, take measurements, document the site, and review key technical constraints, including entrances, circulation routes, seating, kitchen and bar areas, storage, service zones, and restrooms. For HoReCa projects, particular attention is given to operational flows: how guests enter and move through the venue, how staff circulate, how service is organised, where deliveries and storage are located, and how cleaning and maintenance processes are managed.
Based on this information, we prepare the technical brief that forms the foundation of the project. It helps establish clear priorities from the outset and reduces the risk of fragmented or inefficient decisions at later stages.
Stage result: measured drawings, photographic documentation, spatial and operational analysis, functional requirements, technical brief, and a clear understanding of the project constraints.
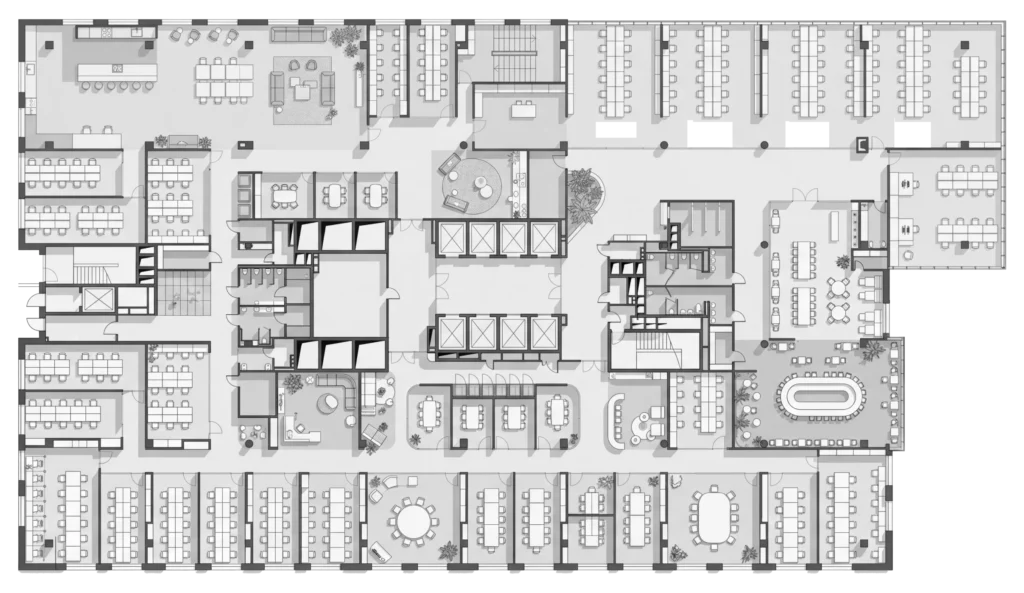
Based on the collected information, we develop the spatial structure of the project and define the relationship between its main functional zones. Particular attention is given to circulation, staff and visitor flows, seating, service areas, storage, accessibility, and the efficient use of space.
We test different planning scenarios to find the right balance between operational requirements, user comfort, and the available area. For commercial and HoReCa projects, we also consider how front-of-house and back-of-house functions interact, helping to reduce unnecessary movement and support more efficient day-to-day operations.
The result is a clear and efficient layout that becomes the foundation for the architectural concept and further design development.
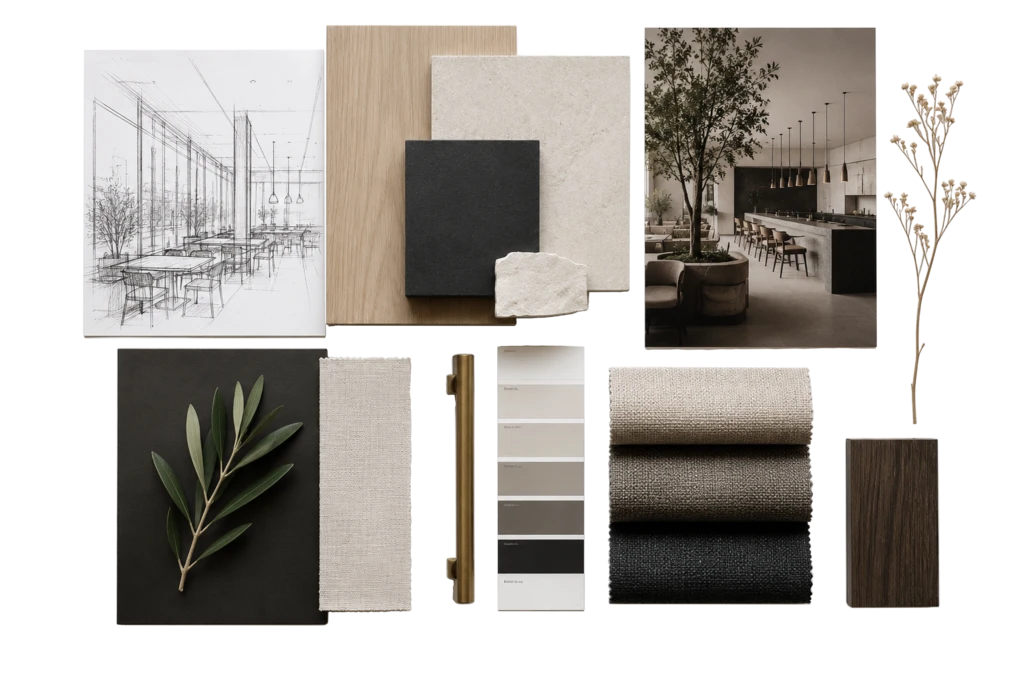
At the concept stage, we establish the overall design direction of the project. We define the atmosphere, material palette, colours, lighting approach, furniture language, and key visual principles that connect the space with the identity and character of the business.
These elements are developed as one coherent system, helping to align the spatial, material, and visual decisions before detailed design begins. The approved concept then becomes the reference point for visualization, material selection, and further project development.
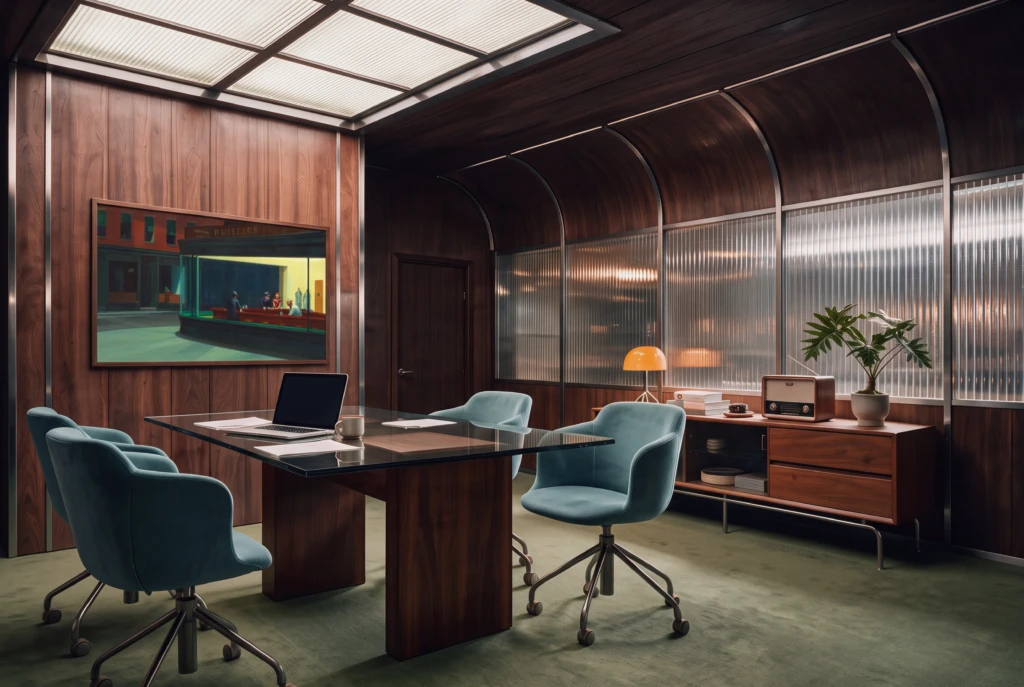
The approved concept is developed into detailed 3D visualizations that clearly communicate the future appearance and atmosphere of the space. We work with composition, materials, lighting, furniture, and key architectural details to create a realistic representation of the project.
At this stage, we also verify the main design decisions, proportions, material combinations, and lighting scenarios before implementation. This allows the project to be reviewed and refined visually before moving on to detailed documentation and construction.
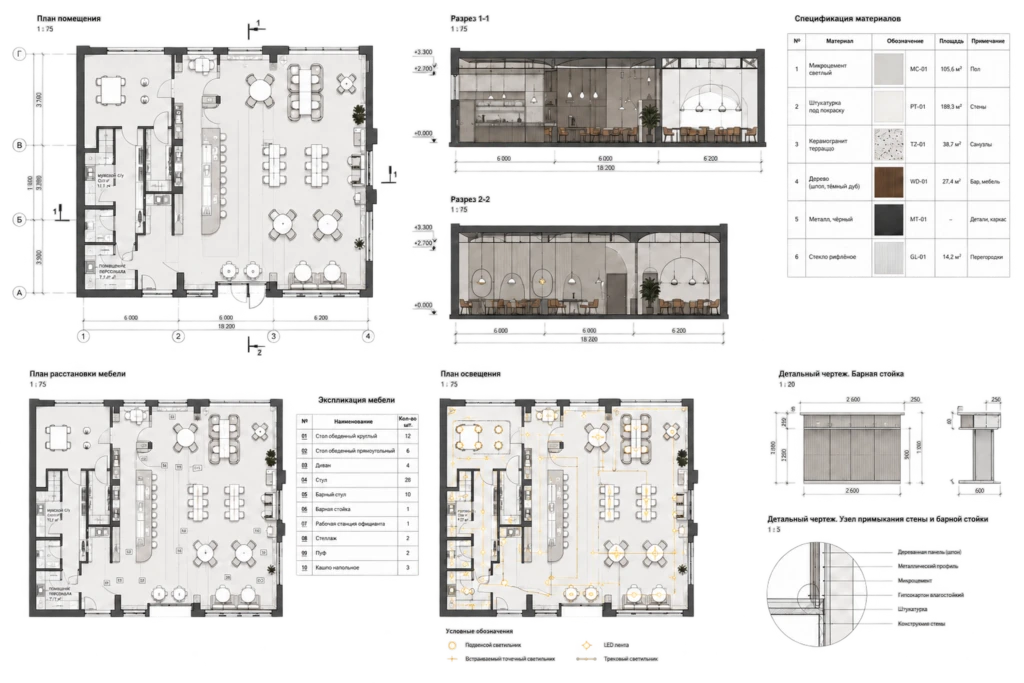
Once the design is approved, we develop the project to the required level of technical detail and prepare the documentation needed for construction and implementation. This includes plans, elevations, sections, detailed drawings, material specifications, furniture and lighting layouts, as well as coordination with engineering systems and other project disciplines.
The purpose of this stage is to translate the approved design into a clear and buildable set of documents for contractors, suppliers, and manufacturers. Key architectural, interior, and technical decisions are coordinated in advance to reduce conflicts during construction and ensure that the project is implemented as intended.
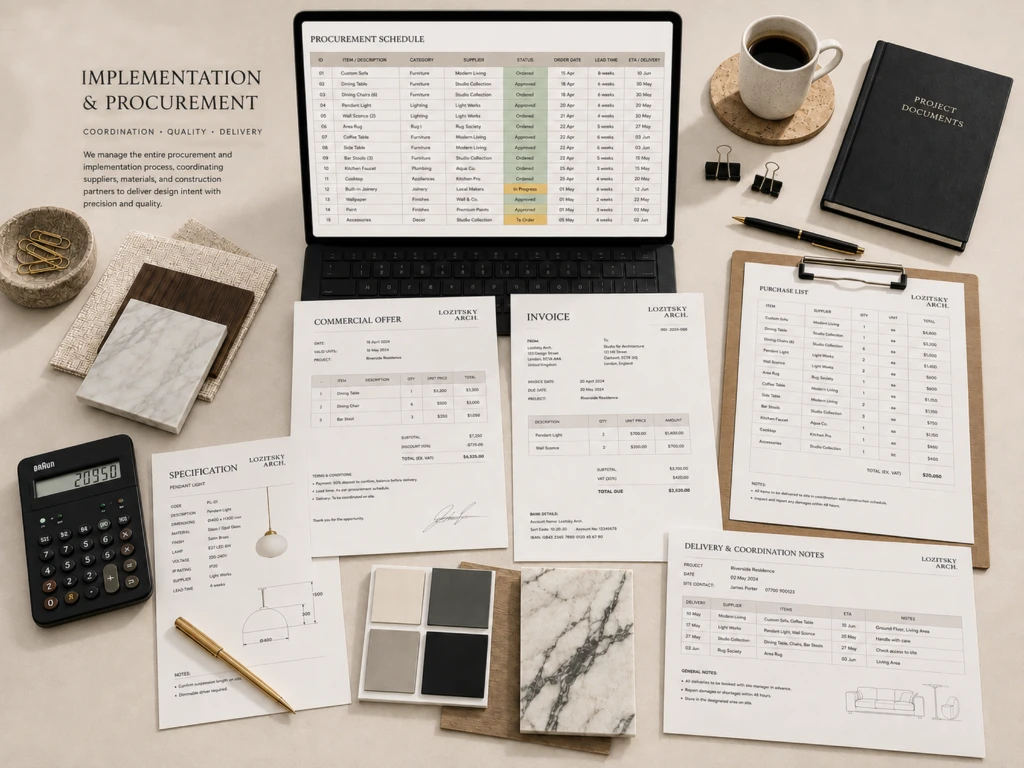
During implementation, we coordinate the selection, procurement, and delivery of materials, furniture, lighting, equipment, and custom-made elements. We work closely with contractors, suppliers, manufacturers, and construction teams to ensure that the approved design is translated accurately into the built environment.
We also coordinate procurement and construction activities, resolve technical and supply-related issues, and align the different parties involved with the approved documentation and specifications. This helps maintain consistency between the design, selected materials, construction process, and the final result.

Throughout construction, we monitor the implementation of the approved design and help resolve questions that arise on site. We review materials, details, and execution quality, coordinate necessary adjustments, and ensure that the key architectural and interior solutions remain consistent with the project documentation.
As the project approaches completion, we review the final works, identify any remaining issues, and coordinate the necessary corrections before handover. This helps ensure that the completed space reflects the approved design, technical documentation, and intended level of quality.
OVERALL PROJECT PROCESS
The project begins with a dialogue. We prepare the project brief, analyse the site or existing property, and carry out the necessary measurements. Based on this information, we develop the spatial layout and the architectural or interior concept, define the principal materials, finishes, and overall character of the project. Once the concept is approved, we prepare the complete set of working documentation required for implementation. During the subsequent stages, we support the construction process, review key decisions, and monitor compliance with the approved project.
Our studio can also take responsibility for construction and the complete delivery of the project, including contractor coordination, procurement, budget control, and the organisation of work on site. This allows the entire process to be managed consistently by one team — from the initial concept and project documentation through to the completed building or interior.
Summary of Stage 2
The project develops from the initial information and agreed brief into a complete architectural concept. We analyse the site and existing conditions, refine the spatial layout, building massing, façades, materials, textures, and overall architectural character. As the concept develops, it is supported by architectural visualizations that allow the future building to be evaluated before detailed design begins.
Once the principal solutions are approved, the concept becomes the basis for the development of working documentation and further implementation. A preliminary construction cost assessment also allows the selected materials and technical solutions to be reviewed against the intended budget and adjusted, where necessary, before moving to the next stages.
Summary of Stage 3
The result of this stage is the construction project: detailed technical documentation defining how the house is to be built. It establishes the architectural and structural solutions, materials, principal technical details, and construction requirements. The package also includes schedules and calculated quantities of the main materials, providing a clearer understanding of the scope and scale of the future works.
With this documentation in place, procurement can be planned in advance, contractor quotations can be compared on a consistent basis, and the construction budget can be controlled more accurately. The project can also be used to organise a tender among construction companies and select a suitable contractor based on a clearly defined scope of work.
Summary of Stage 4
The result is a coordinated engineering project covering the principal building systems: heating, ventilation, water supply, drainage, and the core electrical supply. All systems are developed in relation to one another and coordinated with the architecture and structure of the building. Detailed interior electrical solutions — including the precise locations of sockets, switches, lighting fixtures, and lighting scenarios — are refined later during the Interior Design stage, once the furniture and spatial organisation have been finalised.
The engineering project allows the necessary equipment, materials, service routes, and principal technical solutions to be defined before construction begins. This helps identify potential conflicts between systems in advance, improves budget accuracy, and makes implementation more predictable in terms of programme, cost, and the organisation of work on site.
Summary of Stage 5
By the end of this stage, you receive a fully developed design for the future interior, bringing together the principal decisions for each space. The project includes the approved layout, 3D concepts and photorealistic visualizations, colour palette, finishing materials, furniture, lighting, décor, and other elements that shape the interior. This makes it possible to evaluate the functionality, composition, atmosphere, and overall character of the space before implementation begins.
All approved solutions are consolidated into a single project package and supplemented by a preliminary implementation cost estimate. This makes it possible to compare the proposed solutions with the available budget before work begins and, where necessary, replace individual materials or items while preserving the overall concept and quality of the interior.
Summary of Stage 6
During construction, we support the implementation of the project in one of the agreed formats: client-side project management, design supervision, or turnkey construction. Depending on the level of involvement selected, we can coordinate the overall construction process, contractors, programme, and budget, or focus specifically on monitoring compliance with the approved architectural and interior documentation.
Key structural and engineering decisions, materials, equipment, and principal stages of implementation are coordinated in advance. This helps preserve the integrity of the project, resolve questions arising on site promptly, and minimise uncontrolled changes that could affect the architecture, quality of execution, programme, or final cost of the project.
Summary of the Stage 7
We support the project from the approved design through to the fully completed interior, monitoring its consistency with the concept, working documentation, materials, and technical solutions. Depending on the required level of involvement, we either work with the client’s construction team through design supervision or undertake the complete interior fit-out with our own specialists. In both cases, we coordinate key decisions, resolve design and technical issues as they arise, and monitor the quality of execution.
Our Workflow
The 3D visualization process begins with a detailed review of the technical brief, drawings, references, and the client’s requirements. Based on this information, we create the 3D model, agree on key viewpoints, set up materials and lighting, make the necessary adjustments, and refine the image to its final result.
The more complete and accurate the information provided at the start, the more realistic, well-considered, and aligned with the future implementation the final render will be. Throughout the process, we carefully analyze the project, take into account current market requirements, architectural and interior design styles, and also offer solutions that help strengthen the visual presentation of the project.
Our Workflow
A commercial project begins with an analysis of the site, business objectives, and operational processes. We then develop the spatial layout, concept, 3D visualizations, and working documentation before moving on to material selection and procurement, coordination with contractors, and implementation on site.
At each stage, we connect the design with the practical operation of the space, considering guest and staff circulation, engineering requirements, service processes, materials, and the visual identity of the business. This allows the key decisions to be coordinated in advance and the project to move into implementation with clear documentation, an organised workflow, and fewer unresolved issues during construction.